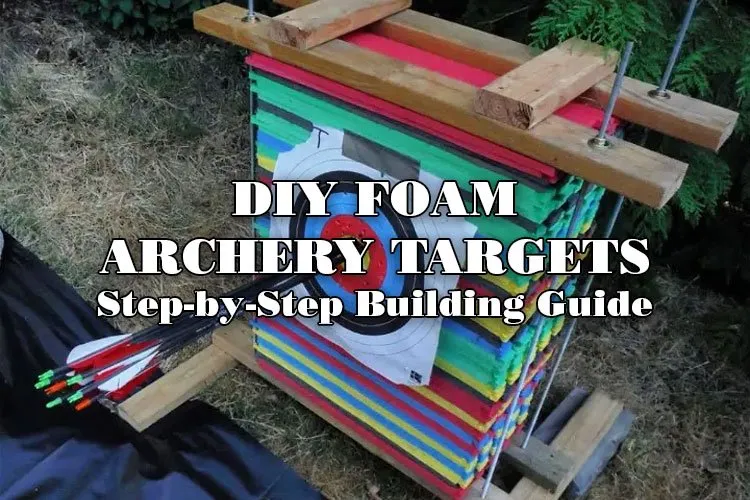
This comprehensive guide will walk you through each process step, from planning and material selection to construction and maintenance. You’ll have a functional, durable, and cost-effective archery target tailored to your specific requirements.
Introduction
Table of Contents
Archery is a sport of precision, requiring skill with the bow and quality equipment for practice. While commercial archery targets are widely available, building your DIY foam Archery target offers customization, cost savings, and the satisfaction of DIY craftsmanship. This guide will focus on creating a layered foam target, which is versatile and suitable for various arrow types.
Planning and Design
Before diving into the construction, planning your target is crucial, considering its intended use, size, portability, and durability.
Objective Identification
Define whether the target will be used for field tips, broadheads, or both. This decision impacts foam choice and design.
Size and Portability
Determine the target’s dimensions based on your practice space and storage. Larger targets provide more room for error but can be cumbersome to move and store.
Design Considerations
Decide if you’ll build a frame to hold the foam or if the foam will be free-standing. Also, consider whether you want a permanent assembly or a modular design for easy repair and foam replacement.
Material Selection
The choice of materials directly affects the target’s performance, durability, and cost.
Foam Type
Polyethylene foam offers high density and durability, is ideal for stopping high-speed arrows, and is suitable for outdoor use. EVA foam is softer, making arrow removal easier, while polyurethane foam balances cost and performance for casual use.
Density
Opt for higher-density foam for broadhead use or high-poundage bows. Lower density can suffice for youth archery or lighter bows.
Additional Materials
Select weather-resistant wood like cedar or treated lumber if building a frame. For a cover, choose durable, weather-resistant fabric. You’ll also need adhesives if layers are to be glued, plus straps or a compression system for modular targets.
Tools and Safety Gear
Collect all required tools and safety gear before commencing the task. You’ll need:
Tools
Saw (for wood and foam), measuring tape, utility knife or hot wire cutter (for foam), drill (for frame assembly), and a staple gun (for attaching the cover).
Safety Gear
- Safeguard your eyes with safety glasses against dust and debris.
- Shield your hands with gloves while cutting and assembling.
- Wear a dust mask in areas with poor ventilation.
Construction Steps
The construction phase involves building a frame (if applicable), preparing and assembling the foam, and adding finishing touches.
Building the Frame
Measure and Cut
According to your design, cut the wood to create the frame’s sides. A simple rectangular or square frame is practical.
Assemble
Use screws and a drill to assemble the frame, ensuring corners are square for a snug fit of the foam.
Preparing and Assembling the Foam
Cutting Foam
Measure and mark your foam to fit within the frame or to your desired dimensions if not using a frame. Utilize a utility knife or hot wire cutter for precise and polished edges.
Layering
Stack the foam layers inside the frame or as a standalone pile. If using different densities, alternate them according to your arrow-stopping needs.
Gluing (Optional)
For a permanent assembly, glue layers together using a foam-safe adhesive. Allow adequate drying time.
Compression
Compress the foam using straps or build a press mechanism into the frame for a modular design. This step is crucial for durability and arrow-stopping effectiveness.
Adding the Cover
Cutting the Fabric
Measure and cut the fabric, ensuring ample excess to comfortably wrap around the foam.
Attachment
Use a staple gun to secure the fabric to the frame or around the foam. Ensure the cover is tight to prevent sagging but not so tight that it compresses the foam excessively.
Finishing Touches
Painting or Marking
Add target circles or designs using paint or markers compatible with your cover material.
Weatherproofing
Apply a waterproof spray to the fabric cover if the target will be used or stored outdoors.
Maintenance and Repair
Regular maintenance extends your target’s lifespan and ensures consistent performance.
Inspection and Rotation
Regularly check for wear, especially in the center where arrows land most frequently. Rotate or flip foam layers to distribute wear evenly.
Repair
Patch holes in the foam with spare pieces, using adhesive if necessary. For targets with removable covers, foam layers can be replaced individually.
Storage
Store your target in a dry, shaded area to prevent water damage and UV degradation.
Tips for Success
Layer Variation
Combining different foam types or densities can enhance the target’s versatility, accommodating various arrow types and speeds.
Environmental Protection
Focus on UV-resistant and waterproof materials if the target will be used outdoors, ensuring longevity and performance.
Cost Management
While quality materials may have higher upfront costs, they can offer better durability and performance, making the investment worthwhile over time.
Conclusion
Building a DIY foam archery target is not just a cost-effective solution for archery practice; it’s also an opportunity to customize your training equipment to your specific needs. You can create a durable and reliable practice tool by carefully selecting materials, adhering to safety guidelines during construction, and maintaining your target. This guide has comprehensively led you through every step of the process, covering planning, design, construction, and maintenance. Success hinges on grasping the unique properties of various foam types, recognizing the role of foam density in arrow-stopping capability, and appreciating the advantages of a sturdy frame and weather-resistant cover for durability. With creativity and attention to detail, your DIY foam archery target can be a valuable asset in your archery practice, providing a personalized experience that enhances your skills and enjoyment of the sport.
Remember, the essence of DIY projects lies in the journey as much as the outcome. Each step offers learning opportunities and the chance to tailor the project to your unique specifications. Whether you’re a seasoned archer or new to the sport, constructing your foam archery target is a rewarding endeavor combining craftsmanship’s joys with the practical benefits of customized equipment.
Faq’s
Q1. What type of foam is best for DIY archery targets?
The optimal foam choice varies based on your requirements. Polyethylene foam is highly durable and great for stopping high-speed arrows, making it ideal for outdoor use. EVA foam is softer, which makes arrow removal more accessible, but it is still durable enough for repeated use. Polyurethane foam is more cost-effective and suitable for light use by beginners.
Q2. How thick should the foam layers be for my archery target?
The thickness of your foam layers should be based on the type of bow and arrows you use. For most applications, layers ranging from 2 to 4 inches thick are sufficient to stop arrows effectively without causing damage to the arrows or the target.
Q3. Can I use different types of foam in the same target?
Yes, using different types of foam in the same target can balance arrow-stopping power and ease of arrow removal. Layering different densities can also help distribute wear more evenly, extending the target’s lifespan.
Q4. How do I maintain my DIY foam archery target?
Regular maintenance includes:
- Inspecting for wear and tear.
- Rotate or flip the foam layers to ensure even use.
- Keeping the target dry and out of direct sunlight.
If the foam begins to degrade, replace the affected layers to maintain the target’s integrity.
Q5. Can I repair the damaged foam in my target?
Yes, minor damages in foam targets can often be repaired by filling the holes with similar foam pieces and using a foam-safe adhesive. For more significant damage, you may need to replace entire layers or sections of the target.
Q6. How do I ensure my foam target is weather-resistant?
If you plan to use your target outdoors, choose naturally weather-resistant foam, like polyethylene. You can also cover your target with a weather-resistant fabric and apply a waterproofing spray to further protect it from the elements.
Q7. What’s the best way to compress the foam layers in my target?
Compressing foam layers can be done using straps that wrap around the target or by building a wooden frame that tightly encases the foam. Compression is critical to maintaining the target’s shape and effectiveness over time.
Q8. How often should I replace my foam archery target?
The lifespan of your foam archery target depends on its usage frequency, the types of arrows used, and how well it’s maintained. Regular inspection will help you determine when to replace individual layers or the entire target. Signs of wear include difficulty stopping arrows or excessive arrow pass-through.
Q9. Is building a DIY foam archery target cheaper than buying one?
Building a DIY foam archery target can be more cost-effective than purchasing a commercial one, especially if you can access affordable materials or repurpose foam. The initial investment in tools (if you don’t already own them) may offset some of the savings, but the ability to customize your target and replace parts as needed can provide long-term value.


