Welcome to Step #2! This article will discuss extracting the arrow from your quiver and properly installing it on your bowstring. You may jump back to get an overall view of the shot sequence by going here.
The Nocking Point and the Nock Locator
Table of Contents
Let’s begin with some words of explanation before we get started. The following phrases are used in various ways by various individuals, but I’ll be using them throughout this essay.
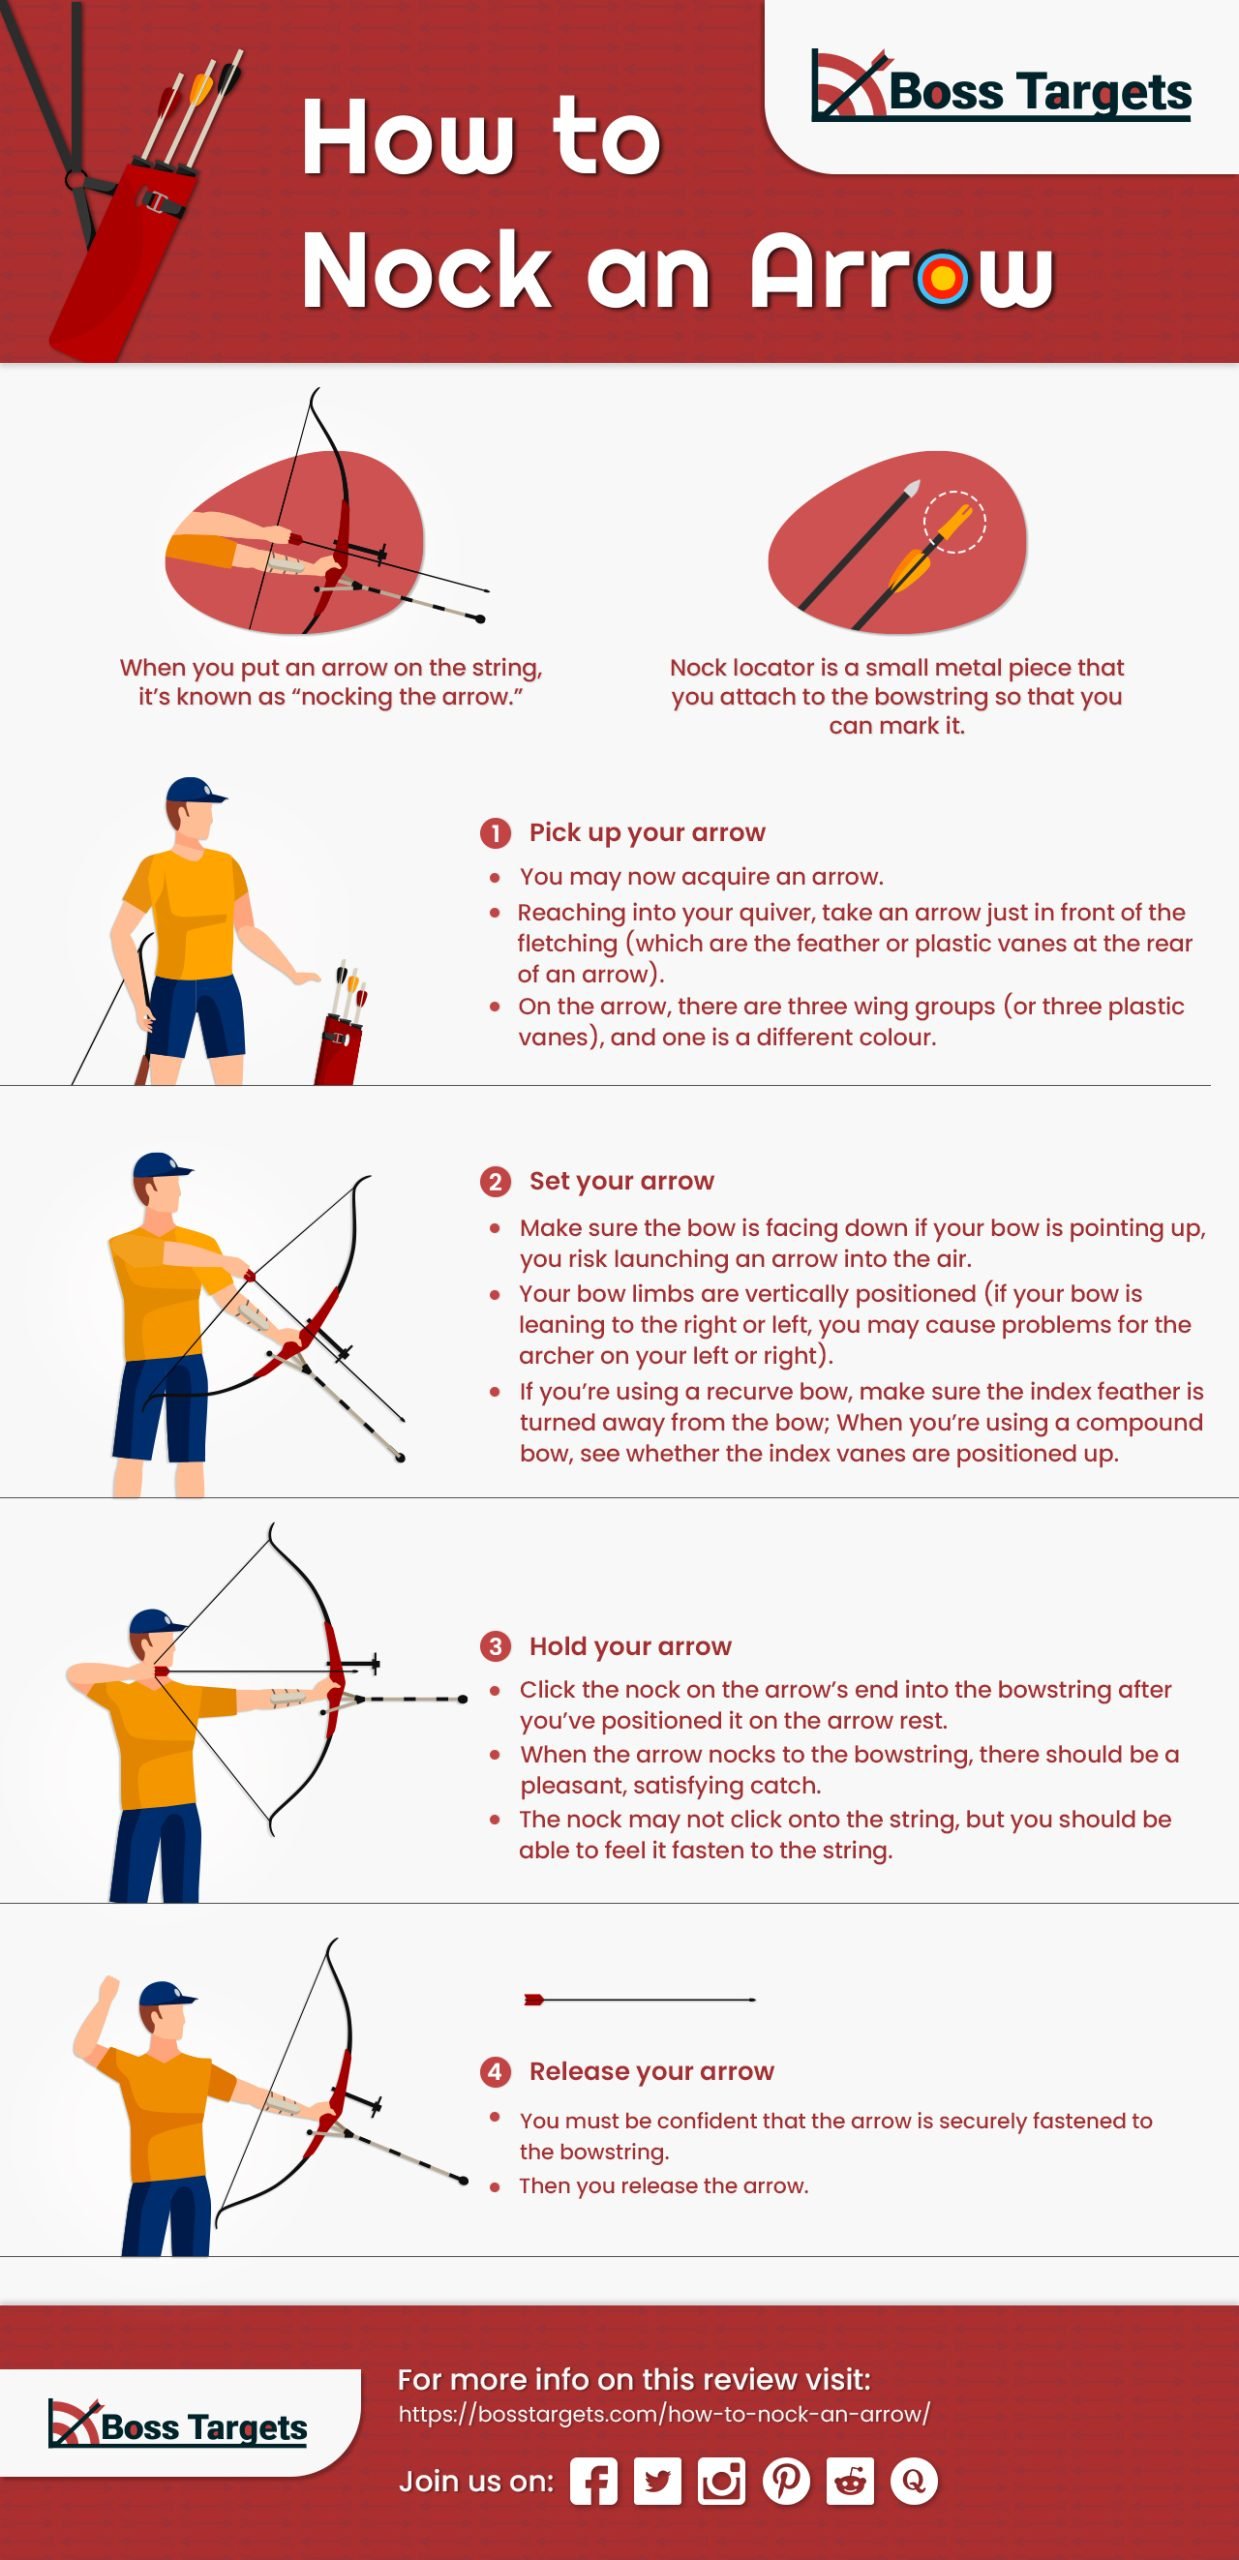
- When you put an arrow on the string, it’s known as “nocking the arrow.”
- The nock locator (sometimes known as a “string nock”) is a small metal piece that you attach to the bowstring so that you can mark it.
- The nocking point on your bow.
Every time you shoot an arrow, you can attach your arrows to the string at the same spot by setting the nocking point on your bow and utilizing the nock locator. Finding out what works and repeating it each time you shoot an arrow entails consistency; therefore, when it comes to nocking arrows, that means nocking the arrow at the same position on the bowstring every single time.
If you’re shooting a rented bow at a range, the nocking point will most likely have been set for you by the range—and that’s fantastic since setting the nocking point may be impossible! (If you bought a bow and are looking for some guidance, I’ve outlined the procedure here.) The nock point, which is a tiny rubber thing you can grab with your fingers, will most likely be utilized by your range, and it is great for beginners.
So You’ve got yourself Stood there in a Perfect Stance.
Because you prepared your stance in Step #1, and it’s fair to say that you’re a natural at this.
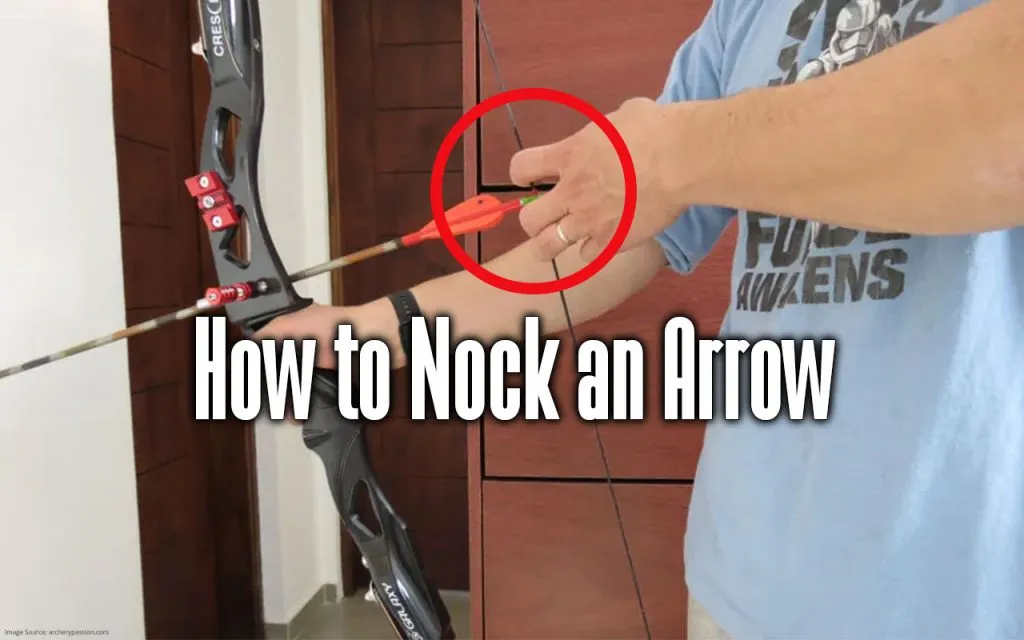
You may now acquire an arrow. Reaching into your quiver, take an arrow just in front of the fletching (which are the feather or plastic vanes at the rear of an arrow). On the arrow, you’ll notice that there are three feather groupings (or three plastic vanes), and one is a distinct color. That’s the index feather (or index vane, if it’s plastic). We’ll discuss index feathers/vanes.
Make sure the bow is facing down (if your bow is pointing up, you risk launching an arrow into the air) and that your bow limbs are vertically positioned (if your bow is leaning to the right or left, you may cause problems for the archer on your left or right). Set your arrow on the arrow rests. If you’re using a recurve bow, make sure the index feather is turned away from the bow; When you’re using a compound bow, see whether the index vanes are positioned up.
(If you’re wondering which way the index vane is pointing – arrows are surprisingly one of the most perplexing aspects of archery.)
Click the nock on the arrow’s end into the bowstring after you’ve positioned it on the arrow rest. When the arrow nocks to the bowstring, there should be a pleasant, satisfying catch (and I really love that sensation!). The nock may not click onto the string, but you should be able to feel it fasten to the string.
You must be confident that the arrow is securely fastened to the bowstring; if it isn’t, and the arrow isn’t properly linked, you might get a dry fire or an errant arrow, both of which are terrible.
And that’s it. You’ve drawn an arrow.
Safety Tip #1
This is the most crucial safety hint: if you drop an arrow while nocking away at the range, LEAVE IT THERE. Most range regulations have a strict rule about dropped arrows: if you’re at the firing line with a large group of people and an arrow slips out of your hands, or – God forbid – an arrow drops from your grasp and rolls a few feet in front of you, leave it alone. Don’t grab it if it’s on the line, and don’t bend over to pick up anything that has dropped to your feet unless the arrow has fallen on its own. When you need assistance, simply holler to a member of the staff, and they’ll come over and pick up the arrow for you. It’s a safety regulation that is intended to keep you safe, and most ranges are extremely firm about it, so bear it in mind.
Safety Tip #2
If you’re not sure, ask someone who has prior expertise. You’re stumped on how to nock an arrow or any other aspect of bow shooting, speak with a staff member at your range or someone who has been practicing archery for some time. If they’re like most archers, they’ll be excited to assist you, and you’ll have to ask them to stop talking about archery.
Safety Tip #3
Keep a lookout for your center serving. There’s a little bit of extra material in the middle of your bowstring, right around where the nock/finger saver is placed. Over time, this material might fray or tatter, and it’s likely that your bowstring needs to be replaced.
Safety Tip #4
Check the nock at the end of an arrow on every shot. This fact is mentioned in the commandment, which states that you should never shoot defective arrows. However, I’ll restate the idea here: the nock is the arrow’s single most vulnerable point, which receives all the energy from the bow.
Modern arrow makers have made a significant stride in producing highly durable nocks, but nocks are subject to wear and tear–particularly if you reuse your arrows frequently. When nocking the arrow, take a quick peek to ensure that it’s in good form. If a nock is damaged, it might cause a dry fire, which is very dangerous. Check the fletching, shaft, and tip for any cracks or damage.
If Nocking the Arrow Is a Little Uncomfortable
That’s fine! When nocking their arrows, novice archers frequently get a little tangled. You’ve got this huge, bulky bow and arrows that are always slightly longer than they appear. It’s a quiver that swings around everywhere—it’s really difficult to put it all together!
But, like with every other aspect of archery, it gets simpler each time you practice it. If you observe someone who has been shooting on a range for a few months. You’ll notice that they have a very fluid approach to hauling an arrow and nocking it with almost no effort. You’ll be there soon, too.


